Sample Data Acquisition Application
Non-Contact Material Inspection/Measurement System with database logging and reporting
| Location : | U.S and Canada |
|---|---|
| Database : | Microsoft Access 2.0 |
| Part Size & Shape : | 12 in. x 12 in x .125 |
| Key Inspection Parameters : | Size, Squareness, Edge Deviation, and coplanarity. |
Description of Process:
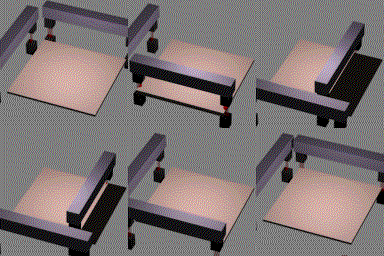
Product is stamped out in a six-cavity die. A sample of product from each cavity is pulled off the production line and placed into the measuring system, which is located in a temperature-controlled lab, every hour by the operator.
 The operator pulls the six sample pieces
off the line. The program prompts the operator to select which cavity the sample came
from, and other various data concerning the current running status of the process. When
this is complete, the operator clicks a button that tells the system to take a
measurement. 9000 measurements are taken in a 5 second time period along each side of the
product. The operator repeats these steps for all six pieces in the sample set.
When the operator has completed measuring the current set of samples, the data is added to the Access Database that contains all of the derived measurements (approximately 50 calculations) based on the 56,000 data points for each sample in the set. After the storage is complete, the Statistical Process Control (SPC) program is initiated.
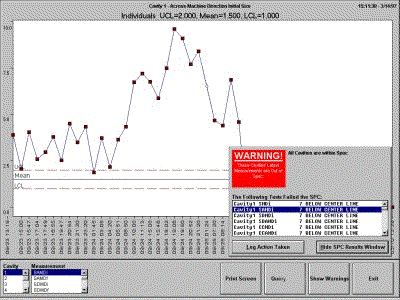
 The SPC program is written in Visual Basic for
Windows 3.0. It uses a VBX to display the graphical chart, but the statistical
calculations are written in Visual Basic code to increase the speed of the program.
When the SPC program updates, a window (shown in the lower right corner of the SPC window) displays which measurements from the latest 7 hours' samplings violates the Control Limits and displays which cavities are beyond the Spec Limits. The data displayed in the graph is the results of the last 48 samples.
One of the prime features of the SPC program is its ability to run a remote computer that automatically updates when the operator in the laboratory has completed measuring the six samples. The lab's SPC program triggers the remote computer (also running the same SPC program in a remote mode, and connected by TCP/IP network about 300 feet from the measuring station) to update. Both systems query the database for the last 48 measurements' data. This setup with the remote PC allows the operator on the line to see immediately the results from the latest set of measurements and adjust for any problems on the line.
Configuration :
| Computer System : | IBM-Compatible Pentium 133Mhz PC |
|---|---|
| System Resolution : | 0.001 in. |
| System Repeatability : | 0.0005 in. |
| Inspection Lines : | Multiple (up to 10) |
| Number of points sampled per inspection : | 54,000 |
| Inspection Time : | 5 seconds for actual measurement system cycle |


